Everything You Need to Know About Open-Fire Grilling

Memorial Dayheralds the start ofbarbecueseason—a time when an easymarinade, a flavorful cut of meat and chilled rosé is all you need for the perfect summertime meal. Before breaking out the steaks, though, consider an alternative to the traditional gas grill: open fire.
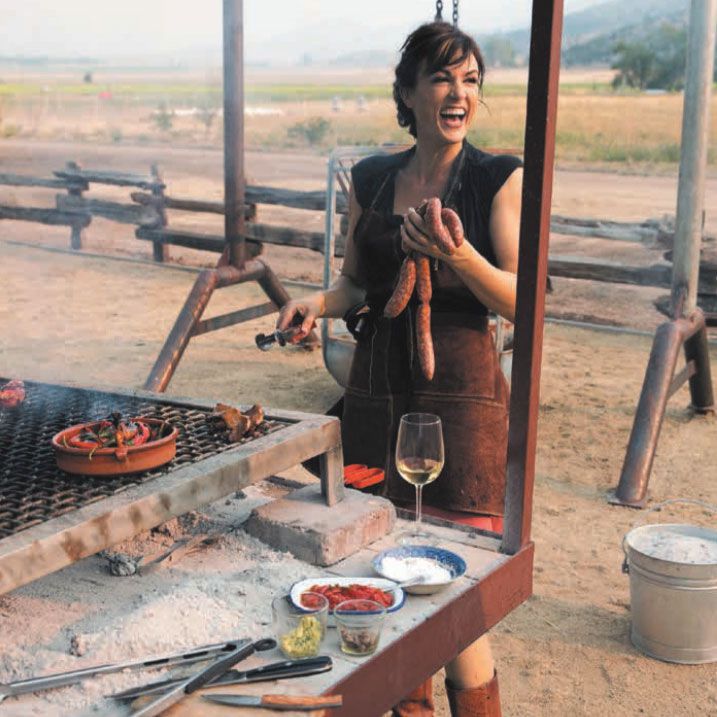
Anya Fernald, the co-founder and CEO ofBelcampo Meat Co. and author ofHome Cooked明火烧烤的热情拥护者。She first learned the practice while living in Sicily, where she found it almost meditative.
“I don’t want to stress out about a million ingredients or a lot of equipment while I cook—staring at a temperature gauge isn’t relaxing,” she says. “The way I learned from the farms in southern Italy was all about simple ingredients, simple techniques and talking with your friends and family while you were cooking.”
In addition to helming the sustainable meat company, an organic farm, an animal welfare-approved butchery and a string of butcher shops and restaurants, Fernald also hosts “meat camps” in northern California. During the three-day retreats, guests learn basic butchery,knife skillsand open-fire grilling, all while staying in luxury tents and gathering for al fresco, family-style meals.
To recreate the experience at home, Fernald offers her guide to building your own wood-fire grill and cooking an uncomplicated yet memorable meal.
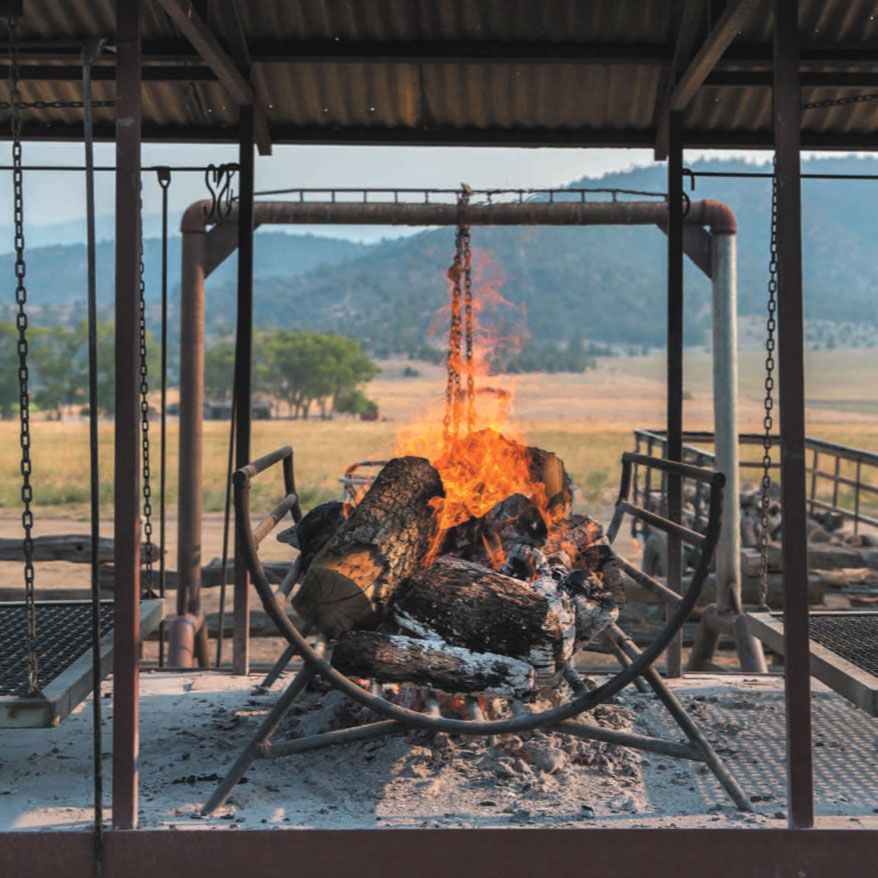
Build a Fire
Fernald says almost any grill will work, but she suggests using something basic, like a Weber. Add about six logs of wood to build a big fire, starting about two hours before you want to cook. “A big fire is better so that when it dies down, you have a generous bed of coals,” she says. When you’re ready to start grilling, she recommends using a poker to break up the logs and flatten the fire.
Create Zones
“It’s important to create three gradations of heat by piling and spreading the coals,” says Fernald. For your perfect outdoor grilling space, she recommends breaking it into these three zones:
The Sear Zone
“Pile about 2/3 of the coals to create the hottest area—you shouldn't be able to stand the heat if you hold your hand one inch above the grill.”
The Cooking Zone
“Pull the remaining third of the coals over to create the second hottest area, which should be slightly cooler. You should be able to hold your hand over the grill grate for two to three seconds.”
The Chill-Out Zone.
“This is the edge of the grill, with very few coals beneath it. The meat can relax here after cooking.”
Grill the Meat
首先把肉在e Chill-Out Zone for about an hour to let it come to temperature, then move it to the Sear Zone roughly twenty minutes before you plan to serve it. “Let them sizzle for about two minutes on each side, using tongs to get a crusty sear on the bone side and a nice fat cap,” she says.
Then, move the meat to the Cooking Zone for two to three minutes on each side. “You'll know they're ready when the resilience of the meat is like poking the skin between your thumb and forefinger when you're making a fist,” she says. Finally, add the meat to the Chill-Out Zone for five minutes, and then transfer to a cutting board for another five minutes before serving.