The Easiest (and Best) Fried Chicken Comes from Indiana

There are plenty of complicated recipes for fried chicken in the world—recipes that have you brine in pickle juice, soak in buttermilk, dredge in two kinds of breadcrumbs, and fry in five varieties of oil at once. But like other iconic foods (case in point: margherita pizza and chocolate chip cookies), fried chicken often tastes best when it's made with a minimalist approach. Indiana-style fried chicken is the poster child for this philosophy.
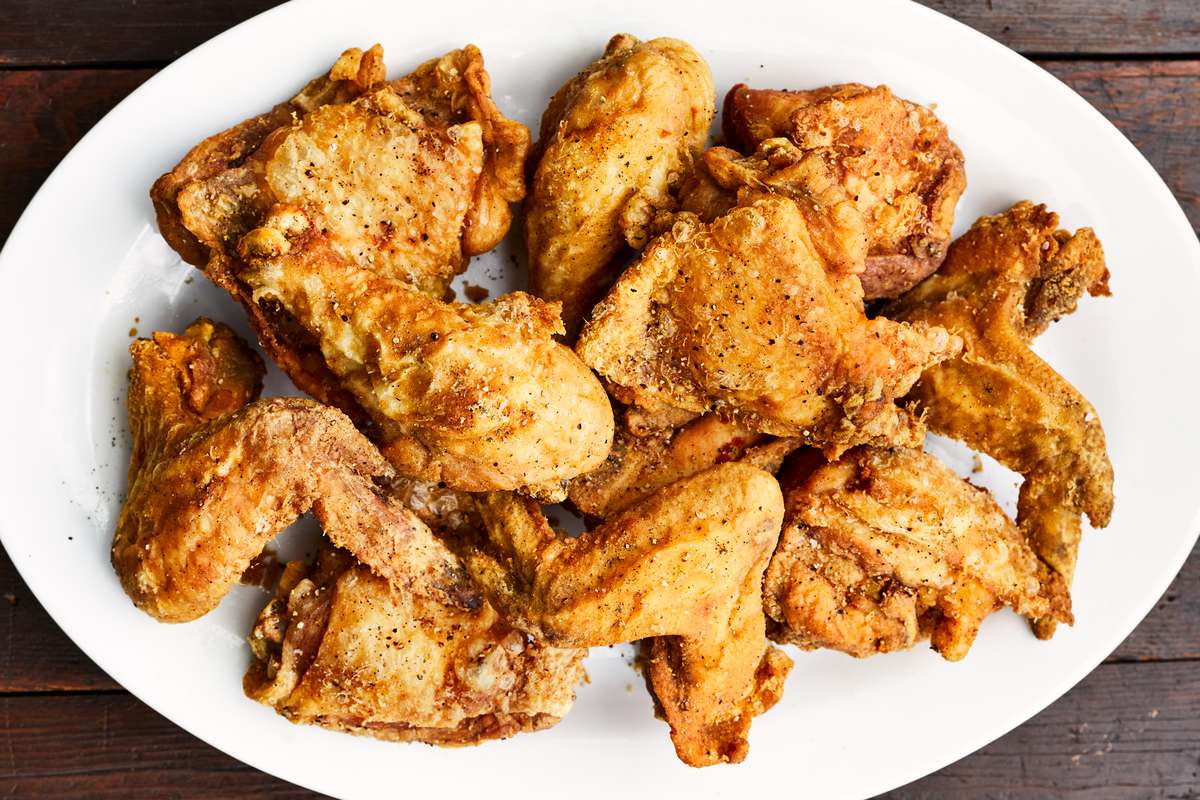
Golden-brown, flecked with black pepper, juicy and shatteringly crisp, this fried chicken is rightly legendary in its home state of Indiana. Fair warning, though—since the recipe is so simple, every ingredient (and technique) counts. Here's how to make the best (and simplest) fried chicken ever:
1. It All Starts With a Brown Paper Bag
No matter how good you are at tossing chicken and flour together in a mixing bowl, you're going to end up with some pieces that are more coated than others—plus lots of flour sticking to the bottom of the bowl. Instead, shake up the flour mixture in a simple brown paper lunch bag, then add your bone-in, skin-on chicken, close the bag, and give it a good shake to evenly and lightly coat the chicken.
2. Use Way More Black Pepper Than You'd Think
不,这不是一个错字:这个配方使用令人震惊mount of coarsely ground black pepper—1/4 cup of it (even though not all of it will end up on your chicken). Even if you set your pepper mill to its coarsest setting, it's going to take way too much time to grind all that pepper by hand. Instead, grind a heaping 1/4 cup of black peppercorns in your spice grinder, shaking it as it spins and checking frequently to check your progress. The finer the pepper is ground, the more intense it's going to taste, so be sure to keep it coarse.
It's always a good idea to pair crispy fried foods like fried chicken with a drink that's bubbly, citrusy, and refreshing, like a chilled can of S.Pellegrino Essenza Tangerine and Wild Strawberry. Every sip will help cut through the richness of the fried chicken, getting you ready for the next bite.
3. Shake Up One Piece of Chicken at a Time
Since the bag is relatively small, you'll want to dredge just one piece of chicken at a time to ensure it's thoroughly coated. Set each coated piece on a rimmed baking sheet to help keep the coating intact before frying.
4. Set Up the Ideal Frying Environment
Since this recipe really is so simple, it's all about the frying—nailing the ideal environment to turn the dredged chicken into juicy, crisp pieces of pure joy. To do this, you'll want to start with a nice heavy 5-quartDutch oven, which maintains a steady heat just as well as a cast-iron skillet does, but has higher sides that make it less messy to fry. Then pour in 5 cups (yes, that's 40 ounces) of vegetable oil and heat over medium heat to 350F. It's worth tracking this with an instant-read or classic deep-frying thermometer, since maintaining that temperature is key to ensuring that the meat is cooked through in the same time it takes the crispy coating to brown.
5. Adjust the Heat as You Fry
Since you're cooking up 6 pounds of chicken, you'll need to work in 3-4 batches to avoid overcrowding, which can lead the temperature of the oil to drop too much. In general, as raw chicken is added to the pot, the temperature of the oil goes down. As it cooks through, the temperature rises again—and if you take a cooked piece of chicken out of the pot without replacing it immediately with a raw piece of chicken, the oil can get too hot. So to keep the oil temperature at the ideal 350F, try to keep a consistent number of chicken pieces in the pot, and adjust the heat a few times as you cook, migrating back and forth between medium and medium high as needed.
6. Sprinkle with Salt, and Serve Hot (or Cold!)
Before removing the chicken to a paper-towel-lined baking sheet, be sure to test doneness by inserting an instant-read thermometer into the center of each piece (avoiding bone)—it should read 165F. It's especially important to check the chicken thighs, since they can vary wildly in size and tend to take the longest to cook. As your golden-brown pieces hit the paper towels, be sure to sprinkle them lightly with an extra hit of salt to make that iconic flavor pop just a little bit more. Then dig in with a side ofpotato saladin summer ormashed potatoesin winter. If you have a summer picnic in mind, let the chicken cool to room temperature before packing it up so the steam doesn't wilt the crispy coating. Then, as you take your first bite, you can start planning your next batch.
Get the Recipe:Indiana-Style Fried Chicken


%20Fried%20Chicken%20Comes%20from%20Indiana)